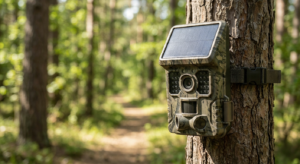
Here is a full guide to install any of your solar security camera in less than 30 minutes.
Installing a solar security camera doesn’t have to be a weekend project. With the right preparation and modern wireless technology, your chosen best solar security camera is fully functional monitoring your property in less time than it takes to watch a TV show. Here’s your complete guide to a quick, professional installation.
1. How Solar Security Cameras systems are installation-friendly
- No electrical wiring needed: The wireless design eliminates the most time-consuming part of traditional camera installation—running power cables from your electrical panel or outdoor outlets.
- Pre-integrated components: Modern solar security cameras come with panels and batteries that connect through simple plug-in cables, not complex wiring diagrams.
- Included mounting hardware: Manufacturers pack everything you need in the box, from brackets to screws, so you won’t lose time hunting for compatible parts.
2. Understanding Your Solar Security Camera System
Before you climb the ladder, it will help you to know what you’re working with.
Power Requirements and Solar Capabilities
Most solar security cameras consume between 4 and 15 watts during active recording and monitoring. The solar panels designed for these systems typically output 2 to 8 watts, which sounds modest but proves sufficient when paired with the camera’s internal battery storage.
These internal batteries range from 4,000mAh to 13,000mAh in capacity. On a full charge, they can power your camera for 8 to 12 hours overnight, or even 2 to 7 days during cloudy periods, depending on battery size and how frequently the camera activates.
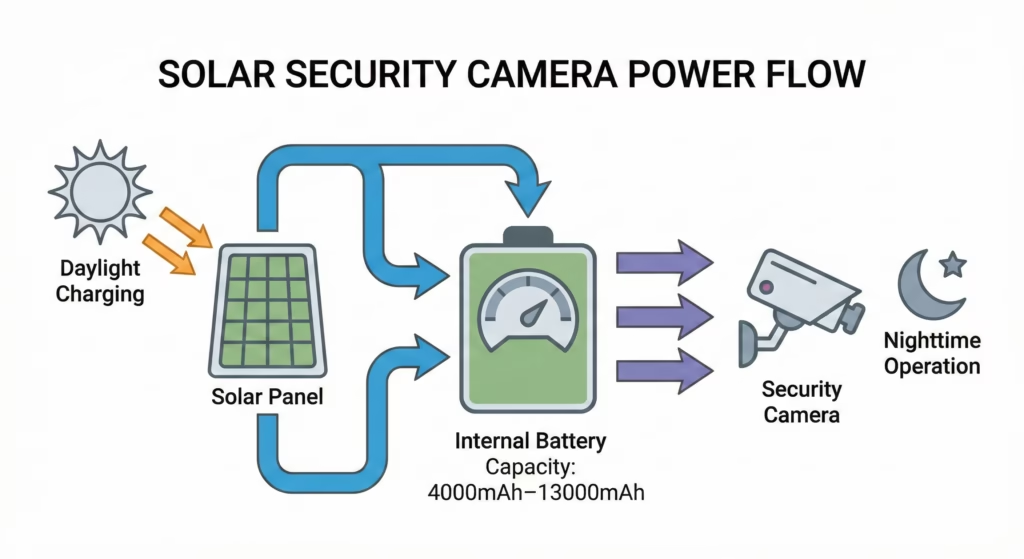
For reliable daily charging, your solar security camera needs approximately 4 to 6 hours of direct sunlight. This requirement shapes where you’ll mount both the camera and its panel.
3. Your 30-Minute Installation Breakdown
Here’s how to allocate your half-hour for maximum efficiency.
Step 1: Prepare Your Equipment (5–10 Minutes)
Start indoors where it’s comfortable. Unbox everything and verify you have all components: camera housing, solar panel, mounting brackets, screws, cable connector, and any included tools.
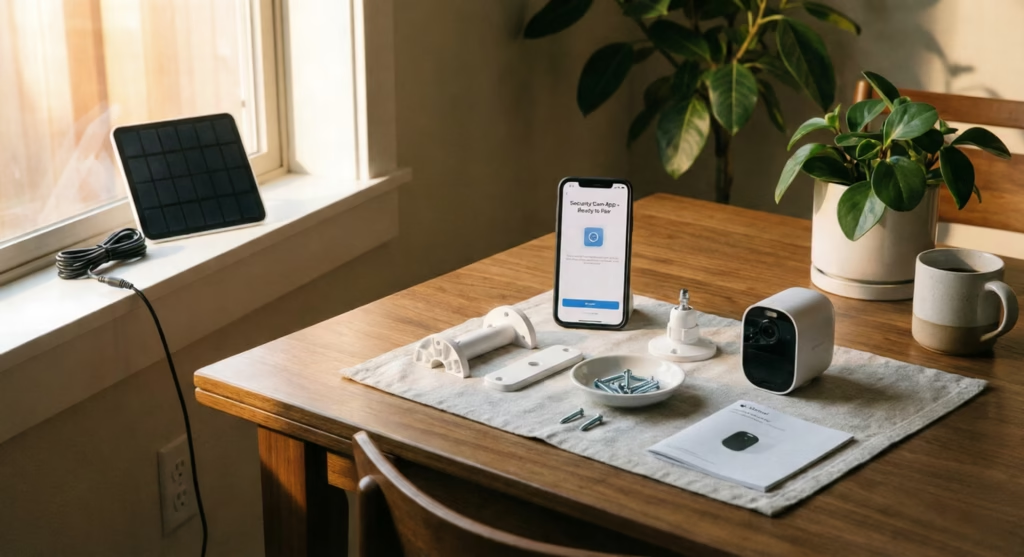
If your camera arrived without a charge, give the battery a brief boost by setting the panel in direct sunlight for 15 to 20 minutes. Even a partial charge helps during setup testing.
Have your smartphone ready with Wi-Fi credentials and download the camera’s app if you haven’t already. Knowing your network password before you’re balanced on a ladder saves frustration later.
Step 2: Choose and Mark Your Location (5 Minutes)
Walk your property with two priorities:
- sunlight exposure
- security coverage.
For the solar panel, you need a spot receiving 4 to 6 hours of direct sun daily. Morning through afternoon sun works best. Look for locations free from tree shadows, building overhangs, or seasonal shade patterns.
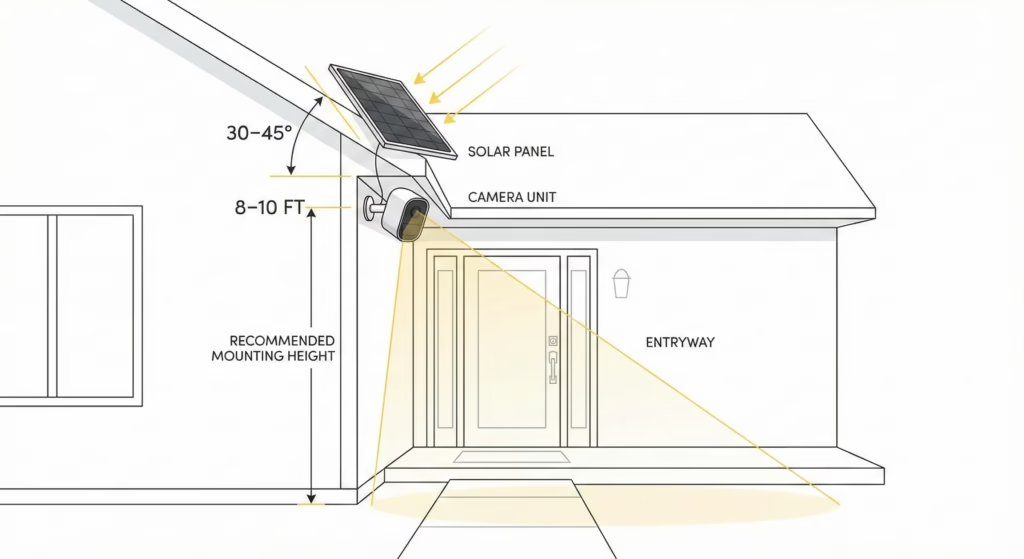
For the camera itself, a mounting height of 8 to 10 feet provides an excellent viewing angle while keeping the unit out of easy reach. You want to capture faces and activity clearly without making the camera vulnerable to tampering.
Use a level to mark your drilling points. Two minutes of careful marking prevents crooked installations that you’ll notice every time you look at your house.
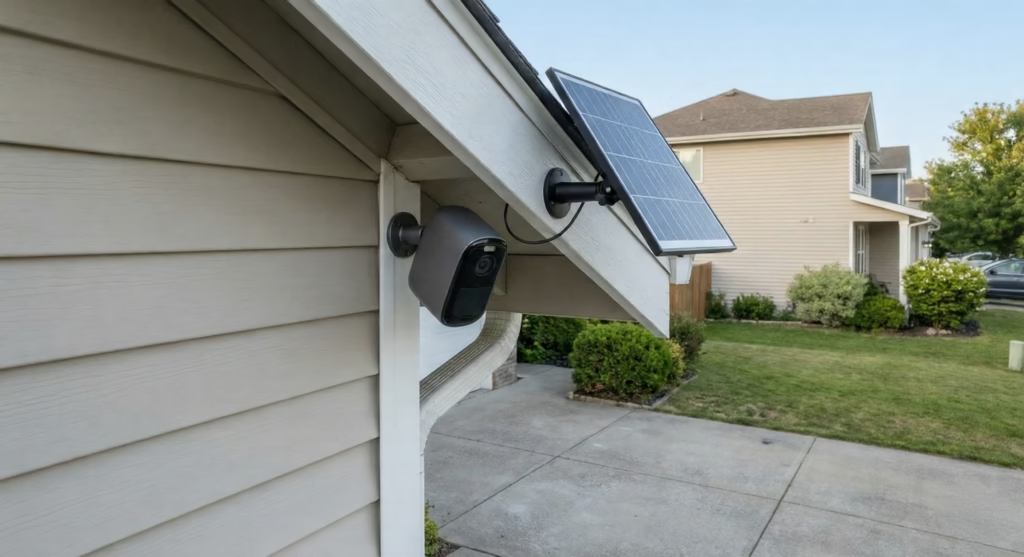
Step 3: Mount the Solar Panel and Camera (10–15 Minutes)
This is your main hands-on work, but it moves quickly with modern bracket systems.
Drill pilot holes at your marked points for the solar panel bracket. Most residential exteriors need a masonry bit for brick or stucco, or a standard bit for wood siding. Secure the bracket with the included screws.
Position your solar panel at a 30 to 45-degree tilt, facing south if you’re in the Northern Hemisphere (or north if you’re south of the equator). This angle captures sunlight efficiently throughout the year. Many brackets have adjustment slots that let you dial in the angle without tools.
Next, mount the camera housing bracket using the same drilling and securing process. Most solar security camera brackets use a ball-joint or swivel design, giving you flexibility to adjust the viewing angle after installation.
Step 4: Connect and Power Up (5 Minutes)
Run the cable from your solar panel to the camera or its battery compartment. Most systems use a straightforward plug-in connector—no wire stripping or electrical knowledge required.
Power on the camera using its physical button or switch. Within seconds, you should see an indicator light confirming the unit has power and the solar panel is charging the battery. Some models display charging status through colored LEDs: red for charging, green for fully charged, or blue for active monitoring.
Point the camera toward your monitoring area and make any needed bracket adjustments for the best field of view.
Step 5: Configure Wireless and App Settings (5 Minutes, Optional)
For basic functionality, your solar security camera is now operational. But to access remote viewing, alerts, and recording features, spend five more minutes on the app setup.
Open the manufacturer’s app and follow the pairing process, which typically involves scanning a QR code on the camera or entering a device ID. Connect the camera to your home Wi-Fi network.
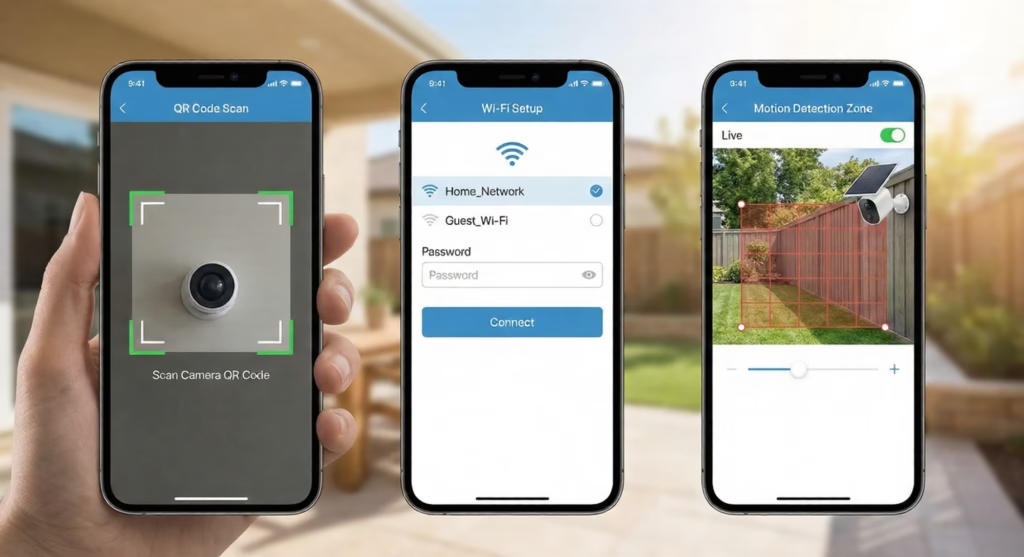
Once connected, customize your motion detection zones to reduce false alerts from passing cars or swaying branches. Set notification preferences so you’re alerted to genuine security events without notification fatigue.
If time is tight, you can complete this app configuration later from your couch. The camera will still record locally and charge from its solar panel without the wireless connection.
4. Optimizing Your Solar Panel Placement
Your installation speed means nothing if the solar panel can’t keep your camera charged. A few technical considerations ensure reliable performance.
- Directional orientation matters significantly: In the Northern Hemisphere, panels should face true south (not magnetic south). In the Southern Hemisphere, face them north. This alignment captures the sun’s arc across the sky throughout the day.
- Tilt angle affects seasonal performance: A general rule is to tilt your panel at an angle equal to your latitude, plus or minus 15 degrees. For example, if you live at 40 degrees north latitude, an angle between 25 and 55 degrees works well year-round. The 30 to 45-degree range recommended earlier covers most residential installations in temperate climates.
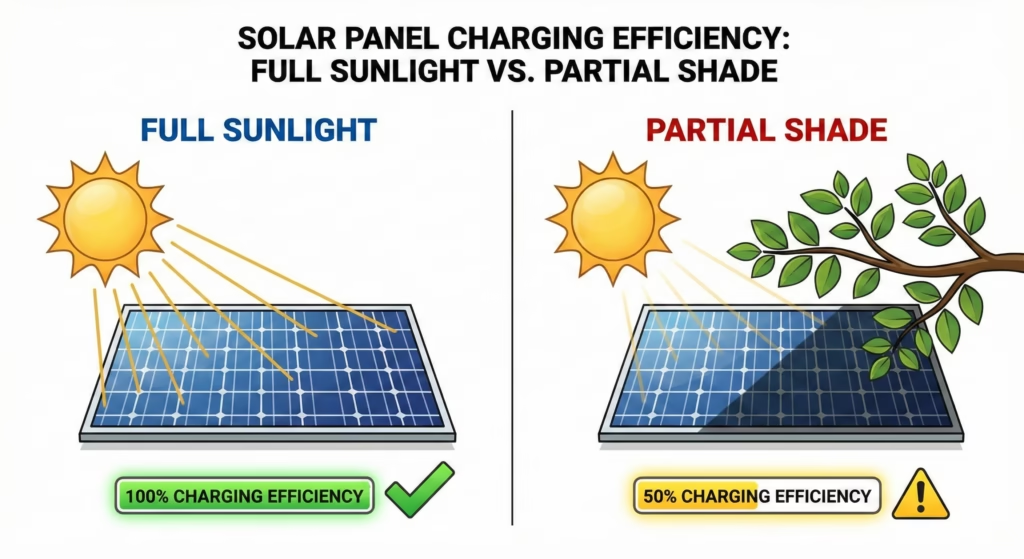
- Shade is your efficiency enemy: Even partial shading from a tree branch or roof edge can reduce solar output by 50 percent or more. When you’re choosing your location in Step 2, observe the spot at different times of day, or use your smartphone’s sun-tracking app to predict shadows.
5. Maintenance for Long-Term Performance
Once your solar security camera is installed, minimal upkeep keeps it running efficiently.
Clean the solar panel every few months, or more frequently in dusty or pollen-heavy environments. A soft cloth and water remove most debris. Dirt accumulation can reduce charging efficiency by up to 25 percent, meaning your battery may not fully recharge on partly cloudy days.
Check the camera lens periodically for spiderwebs, water spots, or dust that could blur your footage. Most housings are weather-resistant, but nature finds a way.
Monitor your battery performance through the app. If you notice the charge dropping faster than expected, it may signal that the panel needs cleaning, the battery is aging, or nearby trees have grown to create new shade.
6. When Will Installation Take Longer Than 30 Minutes
Some situations add time to your installation, and that’s perfectly normal.
- Hard mounting surfaces like brick, concrete, or fiber cement siding require more drilling time and potentially masonry anchors instead of standard screws. Budget an extra 10 to 15 minutes for these materials.
- Multi-camera systems obviously multiply your installation time, though you’ll move faster with each subsequent unit as you refine your process.
- Weak Wi-Fi signal at the installation location can complicate the app setup step. If your router sits far from the camera position, you may need to install a Wi-Fi extender first, or choose a camera location closer to your house.
- Unfamiliarity with tools is nothing to be embarrassed about. If this is your first time using a drill or working on a ladder, give yourself grace and extra time. Safety matters more than speed.
Wrapping Up: Installing Solar Cameras the Easy Way
A 30-minute installation for a solar security camera is genuinely achievable for most homeowners with basic DIY skills. The wireless nature of these systems, combined with plug-and-play solar panels and pre-packaged mounting hardware, eliminates the complexity that makes traditional security cameras a half-day project.
Your camera will be monitoring your property, charging from the sun, and sending alerts to your phone before you’ve finished your morning coffee. And unlike wired alternatives, you’ve accomplished this without running a single cable through your walls or adding a penny to your electricity bill.
The combination of speed, simplicity, and energy independence makes solar security cameras one of the most approachable home security upgrades available today.